How Do You Change the Settings of Your AirPods and AirPods Pro On iPhone?
Apple hit a home run when it got rid of the headphone jack and released the AirPods at the same time. Apple’s multimillion-dollar revenue stream from the AirPods and AirPods Pro has grown. Because the first and second generations of AirPods are the pinnacle of convenience.
A wire’s inconvenience is removed without sacrificing functionality. Phone calls can be answered by tapping the pair of AirPods, and tracks can be skipped with a double tap. You also have the option to modify these settings. By reading on, you’ll learn how to alter the hold force sensor settings on your AirPods and AirPods Pro using your iPhone or iPad.
How to get to the iPhone’s AirPods and AirPods Pro Settings?
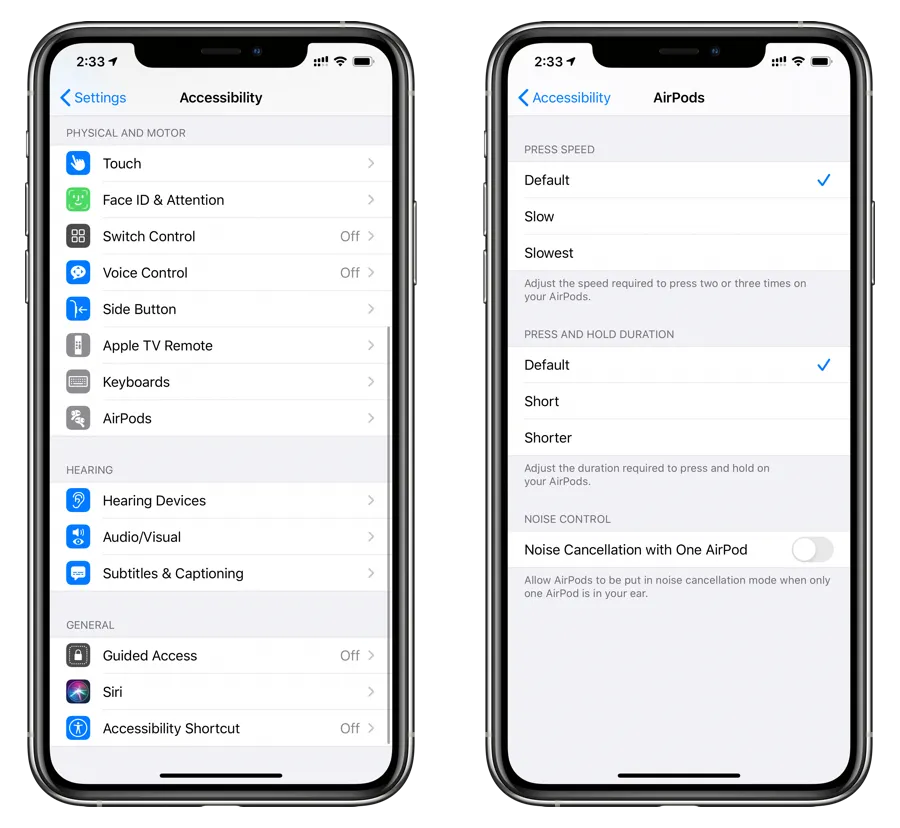
Accessing the AirPods and AirPods pro settings is simple with iOS 16. Below are the instructions for accessing the AirPods settings on iOS 16 and iOS 15.
In iOS 16
- Log into your iPhone’s Settings.
- Choose the one below your Apple ID and shows your connected AirPods Pro.
In iOS 15
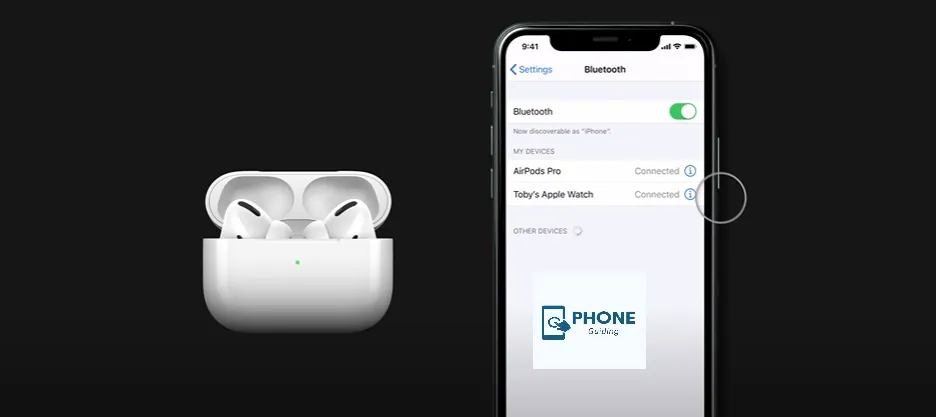
- Open the settings. Click Settings Bluetooth.
- Click the I icon next to MY DEVICES.
Rename Your AirPods and AirPods Pro
- Go to Bluetooth under Settings. (In iOS 16, you can access AirPods under Settings.
- Pick a Name from the menu.
- Tap after renaming your AirPods.
Activate the Active Microphone on One AirPod
The user can use the left or right AirPods pro 1st microphone as the audio input source.
- Go to the AirPods Settings page.
- Tap Microphone as you scroll down.
- Choose one of the three possibilities. (I advise maintaining the Automatic AirPod Switching setting.)
Only the AirPods Max model in the current AirPods lineup is incompatible with this setting.
On AirPods or AirPods Pro, Deactivate Automatic Ear Detection
The media playing automatically pauses when you remove the AirPods from your ears. You can disable this option by customizing your AirPods settings. Continue reading if you want to disable this option or if this setting is not permitted.
- Go to the AirPods Settings page.
- Toggle the automatic ear/head detection on or off, depending on your needs.
On AirPods or AirPods Pro, Enable Live Listen
Users can listen to audio recorded by their iPhone’s microphones using the live listen feature. For instance, you could leave your iPhone in a room and use your left AirPod from its charging case to hear the conversation. The only prerequisite is that you must be within Bluetooth’s coverage area.
You should not use the Live Listen feature to snoop on people because it has various uses. Following that, here is a step-by-step tutorial to help you enable Live Listen on your AirPods.
Modify AirPods’ Double-Tap Responses (1st And 2nd Generation)
- Go to the AirPods Settings page.
- Under the DOUBLE TAP AIRPOD section, select Left/Right.
- You can choose from activate Siri, Play/Pause, Next Track, Previous Track, or Disable Double Tap.
Modify AirPods Pro Press-And-Hold Actions
For AirPods 3 and AirPods Pro (1st and 2nd generations), you cannot alter the press and hold single, double, or triple tap gestures, but you can alter the media and hold actions. This is how you do it:
- Go to the AirPods Settings page.
- Under the Press and Hold AirPods option, choose Left/Right.
- To activate Siri or switch between the Noise Control modes, select one of the AirPods.
The stem designs of AirPods Pro and AirPods 3 are the same, but AirPods 3 do not have ANC. As a result, the noise control mode is only accessible on AirPods Pro. You can toggle between Active Noise Cancellation and Transparency Mode and turn them off using the instructions above.
On The AirPods Pro and AirPods Max, Enable Spatial Audio
Turn on Dolby Atmos spatial audio on Apple Music before continuing.
- Go to the AirPods Settings page.
- Opt for Spatial Audio.
- Decide to use the Spatial Audio option on the following screen.
- Click Done.
You can create customized Spatial Audio with iOS 16 or turn off automatic ear detection; here’s how:
- Go to the AirPods Settings page.
- Under the Spatial Audio section, choose Personalized Spatial Audio.
- Click Set Up Custom Spatial Audio.
- Read the information, then click Continue.
- To configure the feature, adhere to the on-screen instructions.
*AirPods Pro, AirPods Pro 2nd Gen, AirPods 3, and AirPods Max all spatial support audio.
AirPods’ Accessibility Options
With iOS 16, Apple combined the accessibility options for AirPods into a separate AirPods section. Thus, to access and modify some AirPods settings, such as Press Speed, Press Duration, etc., you no longer need to access the Accessibility settings. And here’s how to modify the available settings:
- Open the iPhone’s settings.
- Go to the AirPods Settings page.
- Go down the page and click Accessibility.
- You can now change the speed needed for the Press Speed’s duration. Default, Slower, and Slowest are the choices.
- The length of the press and hold can also be changed. Default, Shorter, and Shortest are the choices.
- You can modify the time that elapses between swipes because the AirPods Pro 2nd generation supports gesture controls for volume adjustment. Default, Longer, and Longest are the choices.
AirPods cannot access this setting (1st and 2nd generation).
Use One AirPod to Turn On Noise Cancellation
The AirPods Pro’s unrivaled Active noise cancellation and transparency mode are improved even further with the AirPods Pro 2nd generation. Active noise cancellation was only accessible when choosing to wear both AirPods. This has changed, and you can now wear just one AirPod and still benefit from the Active Noise Cancellation found in the AirPods Pro series. To enable it, follow the steps below.
- Open the iPhone’s settings.
- Go to the AirPods Settings page.
- Go down the page and click Accessibility.
- Turn on the One AirPod for the Noise Cancellation setting under Noise Control.
There is no need to introduce AirPods Max. They are a reliable pair of headphones with excellent sound quality and the ease of the Apple ecosystem. Despite some flaws, the Transparency mode on the AirPods Max is among the best in the Headphone market. The AirPods Max has the following settings that you can modify.
Finally
This guide answered some of your questions about the AirPods settings.
FAQs
How to switch the digital crown’s rotational direction on AirPods max?
The volume can be increased or decreased on the AirPods Max by rotating the Digital Crown in either direction. Continue reading if you want to invert the default rotation.
Go to the AirPods Settings page.
Digital Crown, press.
Choose Back to Front or Front to Back under Increase Volume By Rotating, depending on your preference.
How to change the AirPods max’s noise-canceling button cycle setting?
The AirPods Max has some of the best Active Noise Cancellation and Transparency modes. You can change between the three settings by pressing the button on the suitable headphone module.
Go to the AirPods Settings page.
Choose one of the three choices under the Button Cycle Between option, and the button will alternate between your choices.
Can you change the EQ settings on AirPods Pro?
From the Home tab, tap the Settings icon. Select Playback > Equalizer. Test out the presets to see what sounds best; most recommend Bass Booster for AirPods Pro users. Alternatively, you can adjust the EQ manually by dragging the sliders at the top of the screen.
How do I turn up the bass on my AirPods Pro?
To find them, connect your AirPods Pros to your iOS device. Open Settings, navigate to Accessibility → Audio/Visual and toggle the Headphone Accommodations switch to on. Now you’ll be able to tweak the new settings to your liking. I prefer the “Balanced Tone” of the three tunings and “Slight” for the boost amount.
.

