How to back up an iPhone?
It will indeed help if you back up your iPhone and other devices. The primary purpose of doing so will be to have all the information and data about your iPhone on different devices if you lose it or if it is damaged.
Various Effective Ways to Back Up iPhone
If you want to create a backup for your latest iPhone without worrying about storage space, here is what you need to do. But first, you must ensure that your Wi-Fi network is vital. Then, and only then, will any device backup be successful. The following are the techniques to create a backup:
- Backup iPhone with the help of iCloud.
- Backup iPhone with the help of a Mac.
- Back up your iPhone with the help of a Windows PC.
1st Technique: Backup iPhone with iCloud
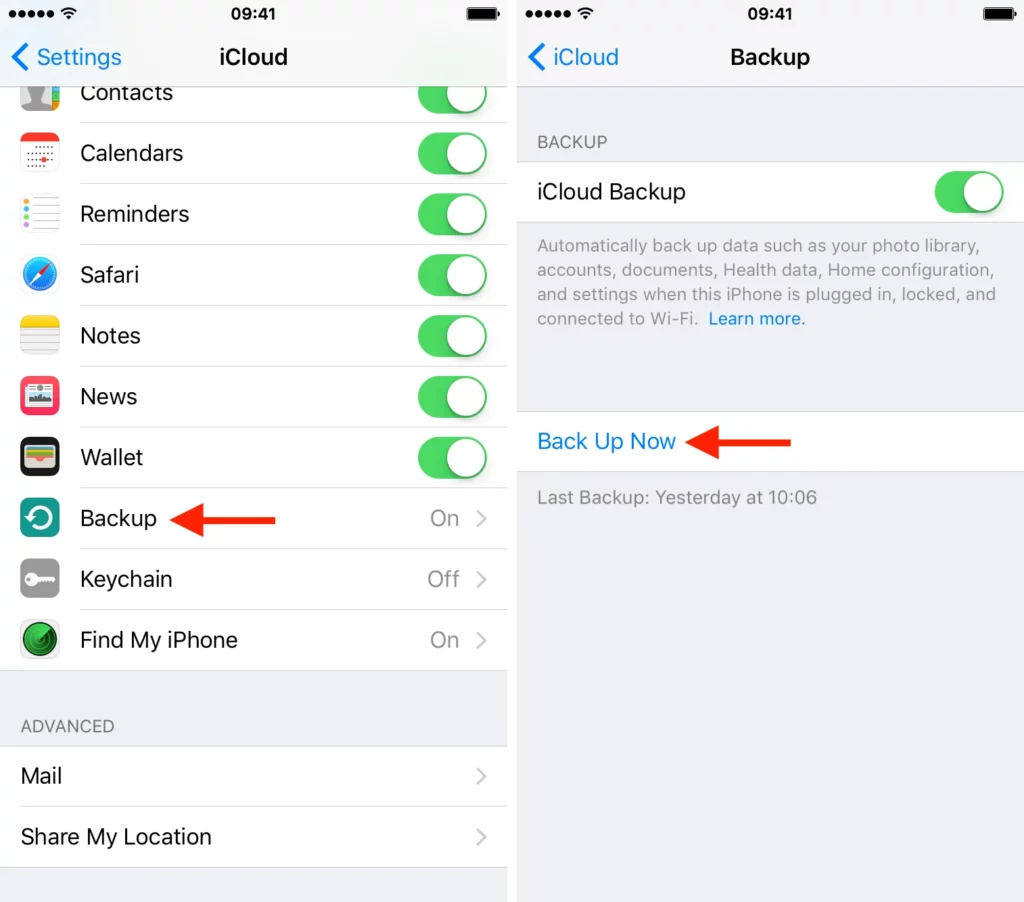
If you also want to back up your iPhone using iCloud effectively, here are the steps you must follow:
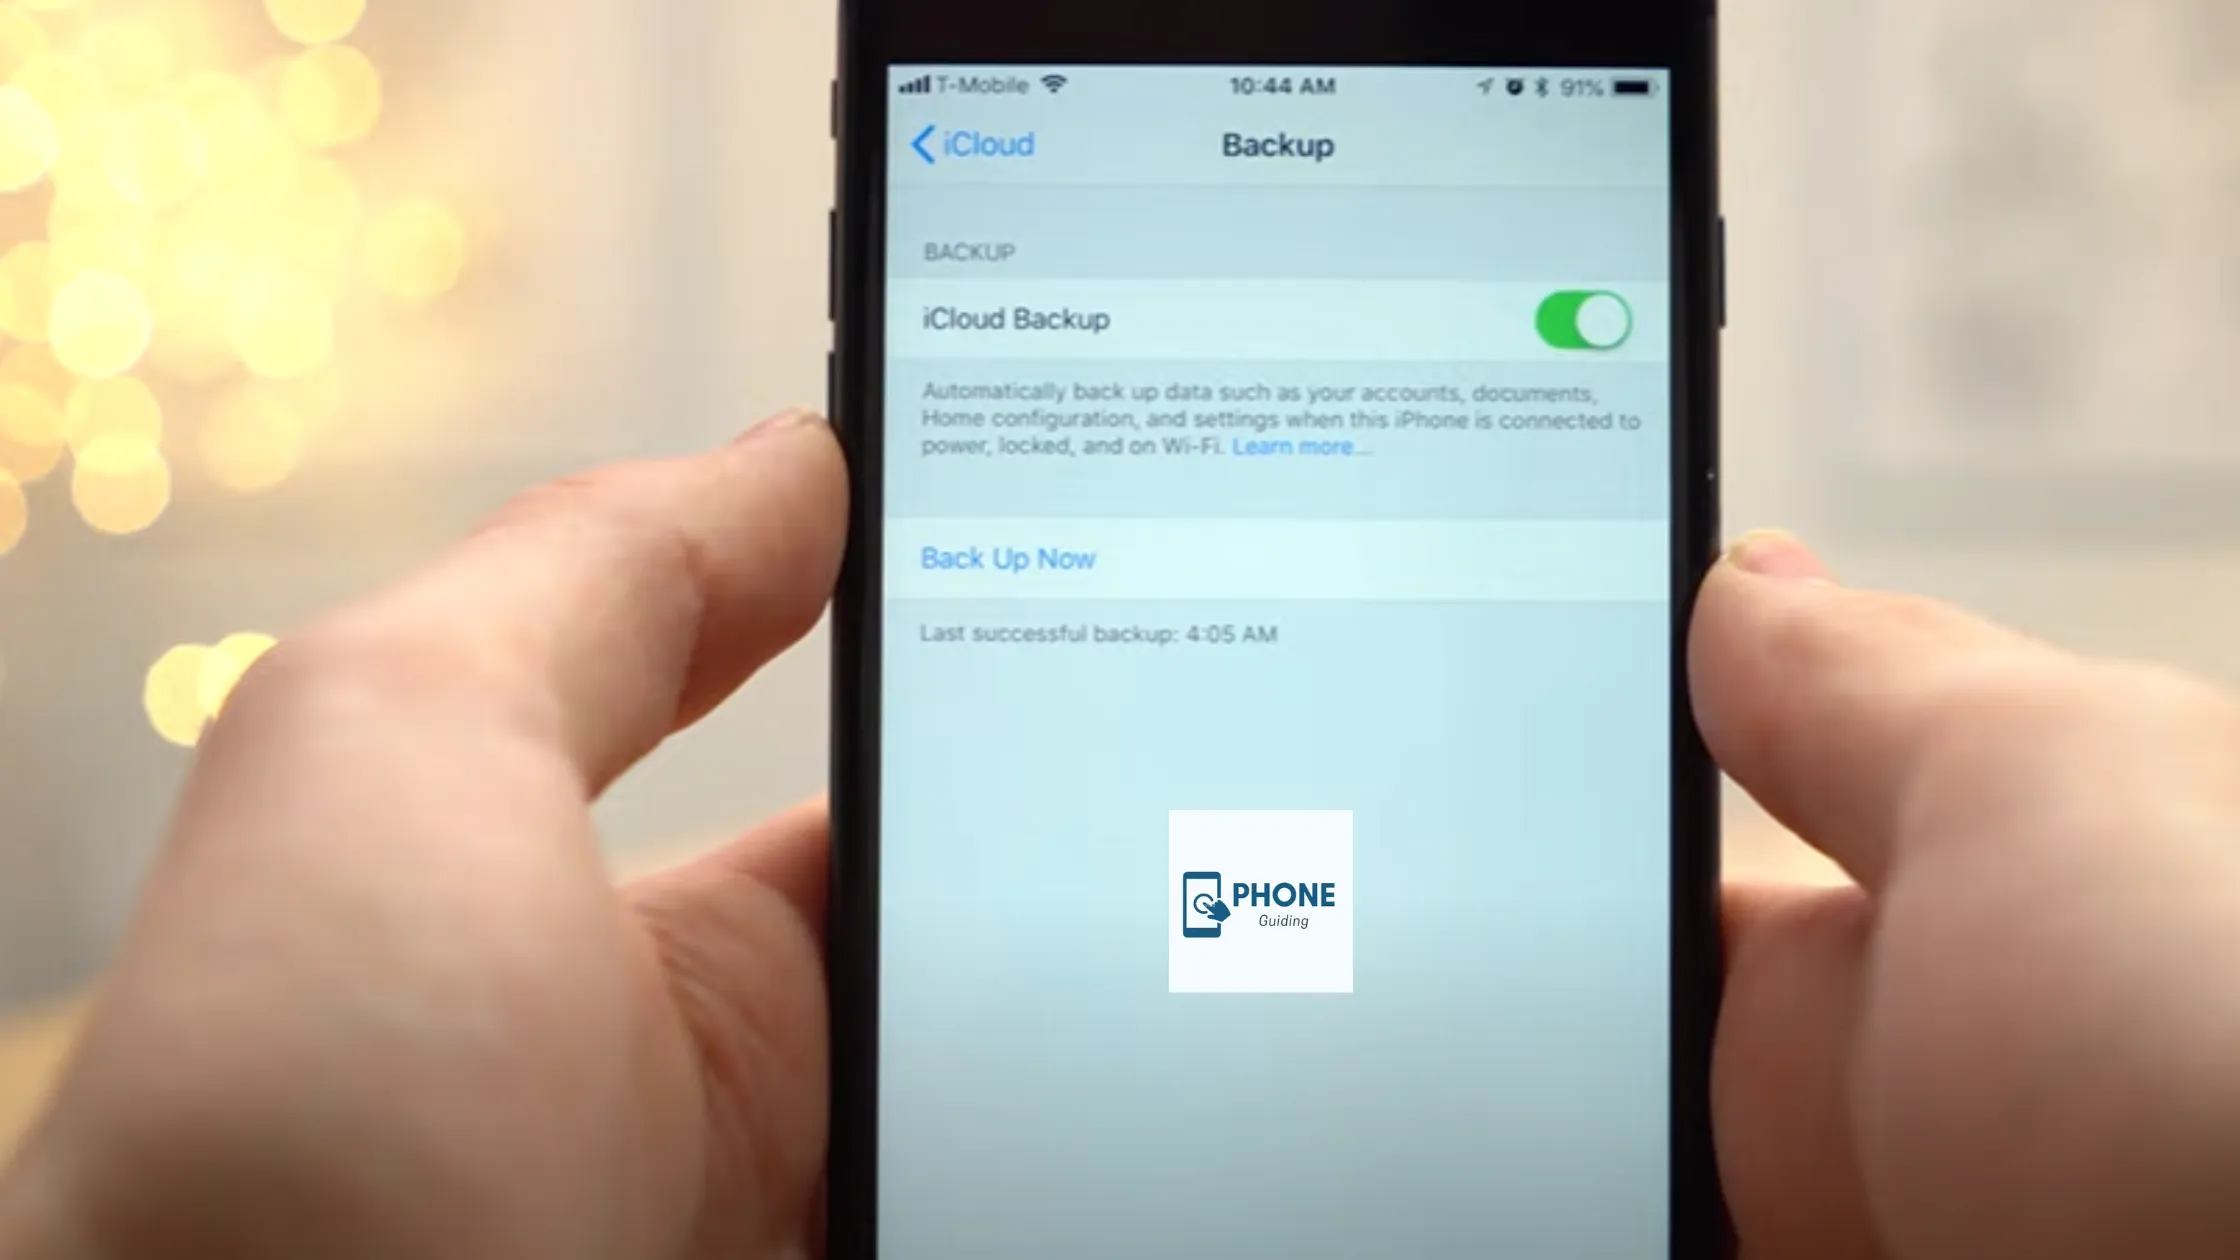
- Open settings in your name, iCloud, then iCloud and iCloud backup.
- When the iCloud backup is turned on,
- Then, daily, when your iPhone is locked, connected to a Wi-Fi network, and connected to a power source, iCloud will automatically back up your iPhone.
Backup on Cellular Data:
Your iPhone’s carrier may allow you to back up your iPhone on cellular data if your iPhone supports 5G. Here are the required steps that you need to follow:
- Open settings
- Go to your name.
- Open iCloud and allow the option of backup over cellular data.
Manual Back Up:
Here is also what you need to do if you would indeed like to perform a manual backup.
- Open settings.
- Go to your name and iCloud settings.
- Open the “manage account storage” option.
- Now open the backup options.
- From here, you can choose an option.
iCloud Syncing
- Open settings in your name, iCloud.
- Now go to the features of the show.
- Now choose the app you want; all its information will be stored in iCloud.
- All the information of that desired app will keep updating, but that information will not be included in the backup until you add it in.
2nd Technique: Back up your iPhone with Your Mac
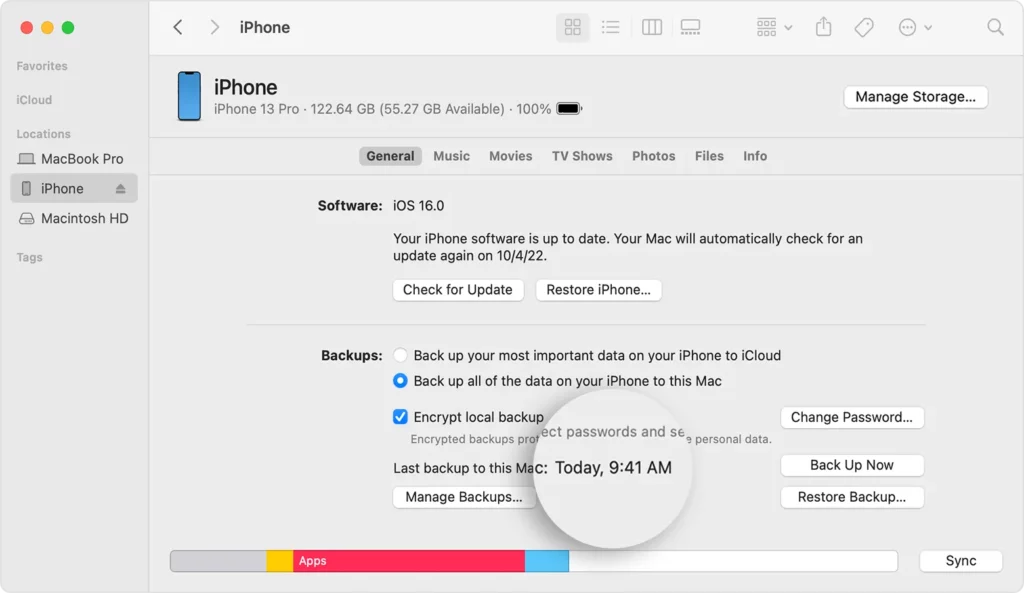
You can also have backup solutions on your Mac. You have to follow some steps precisely.
- First, connect your iPhone, iPad, iPod, and computer with a cable.
- You now have to select your iPhone in the Finder sidebar.
- To back up your iPhone, you have to use the finder.
- For that purpose, macOS 10.5 or the latest version is required. You will have to use iTunes to back up your iPhone.
- If you have older versions,
- It would help if you pressed “general” at the top of the finder window.
- Now choose the option ”Back up all the data on your iPhone to the Mac.”
- Select the “Encrypt local backup” option if you want to protect your data with a password or encryption.
- Then, in the end, you have to click “Back Up Now.”
- You can back up your iPhone wirelessly with a Mac by setting up syncing over Wi-Fi.
You should have your Apple ID, and you can also set the date and time of backup before processing a backup.
3rd Technique-Backup iPhone with Your Windows PC
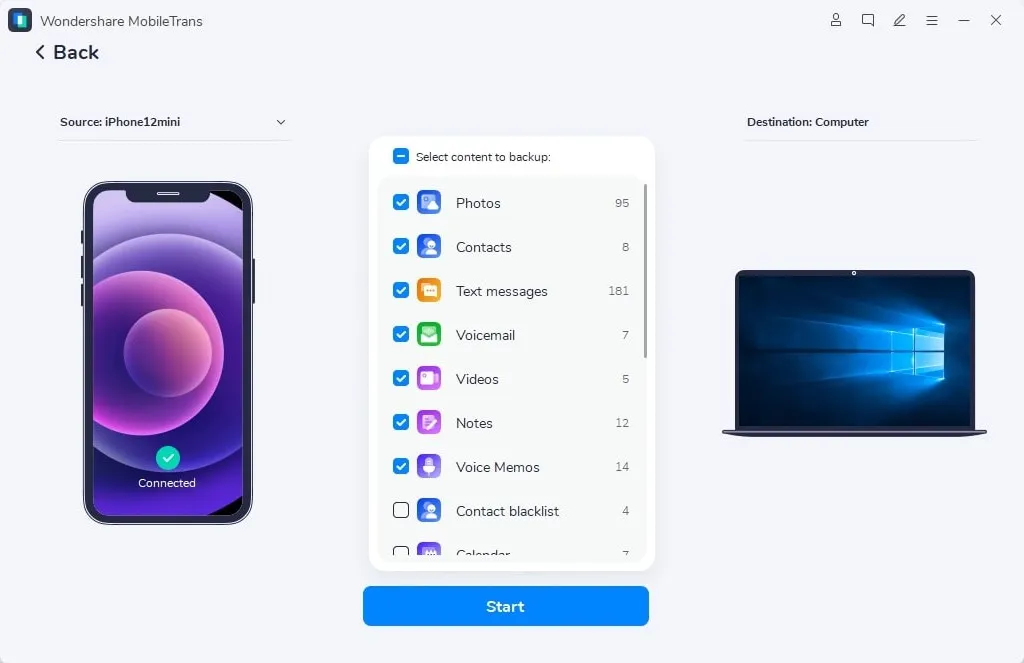
You can also back up your iPhone with your Windows PC and encrypt the local backup with a password to protect the data. Here are the required guidelines that you need to follow step by step.
- First, connect your iPhone to your widow’s computer with a cable.
- Open the iTunes app from your PC.
- Now, click the option of iPhone available at the top left of the iTunes window.
- Now, click the option of “Summary.”
- Choose the option of “Backup now.”
- If you want to encrypt your backups, choose “Encrypt local backup.”
- Then select the option of setting a password and setting up a password for your backup.
Process of Opening Backup
If you want to see the backups you stored on your computers, follow the following steps.
- Go to edits and then preferences.
- Then choose devices.
- Your encrypted backup will have a lock icon on top of the list of all backups.
- Wi-Fi can be used for the backup of iPhones wirelessly and more conveniently.
Upsides You May Experience to Back Up Your iPhone.
There are many advantages to iPhone backups. Most of them are mentioned below.
- It gives you an easy way to transform photos and videos somewhere safe.
- It is one of the most straightforward processes, and anyone can perform it.
- The backup material is straightforward to access.
- The backups are secure and reliable if you encrypt them.
- They are not costly at all.
- They store all your information in case you lose the original.
Bottom Line
It is essential to back up your iPhone and keep track of and time of your last backup. So, you can plan a new one. It is necessary for a way that it creates a copy of your material, the one that you want to back up and store someplace safe. There are many ways of backing up iPhones. Some of the most used and reliable ones include iCloud for backups, a Mac for backups, and a Windows PC for backups. All of them are easy-to-use methods.
If you never back up iPhones, then you need to start now. This will help you immensely and has many benefits if you lose your iPhone, break it, or damage it.
To back up your iPhone, go to “Settings,” tap your name, select “iCloud,” and choose “iCloud Backup.” Toggle on the “iCloud Backup” switch and click “Back Up Now.” Alternatively, use iTunes or Finder on your computer for a secure backup of your iPhone data.
Frequently Asked Questions
Here are some frequently asked questions.
What to do if You Can’t back up your iPhone to iCloud?
Here is what you need to do in such a situation.
Go back up settings.
Check if the iCloud storage has run out or is available.
If there is no more or less space, reduce the size of your backup.
The other option is to get another iCloud plan.
What to do if You are notified of “Your Last Backup Was Not Completed”?
Here are also the steps that you need to follow.
Go to your settings.
Connect to Wi-Fi, and check the Wi-Fi connection.
Now download all the delayed and pending updates.
And retry another Wi-Fi.
Why is iCloud taking longer than before to back up an iPhone?
Your Wi-Fi connection might be weak. So, here is what you need to do.
Check the Wi-Fi Network and the iCloud Storage As Well
If nothing works, archive essential data; if this also has not worked, contact the Apple Store.
Read Also: How to change the iCloud Apple ID on iPhone Without a Password?
