How Do You Change HEIC to JPG on an iPhone?
If your iPhone stores photos as HEIC files, this guide is your solution. Discover how to convert HEIC to JPG effortlessly on your iPhone, ensuring compatibility with various apps and devices. Plus, learn how to change your iPhone settings to capture photos in a universally recognized format.
Why does the iPhone take HEIC photos, and what does HEIC stand for?
Apple’s exclusive implementation of the HEIF (High-Efficiency Image File) format is called HEIC. This more recent file format is meant to be a better way to save your photos, reducing the amount of data while maintaining high quality.
Is HEIC superior to JPG?
Yes, the HEIC format is superior to JPG in many ways, especially when compressing images without sacrificing image quality. What devices and apps support converting HEIC files is the issue that is causing problems. Even though HEIC is being used by more and more developers every day, JPG, the tried-and-true standard, is still more widely used.
Method 1
How to Use the iPhone’s Most Compatible Setting to Convert HEIC to JPG On iPhone
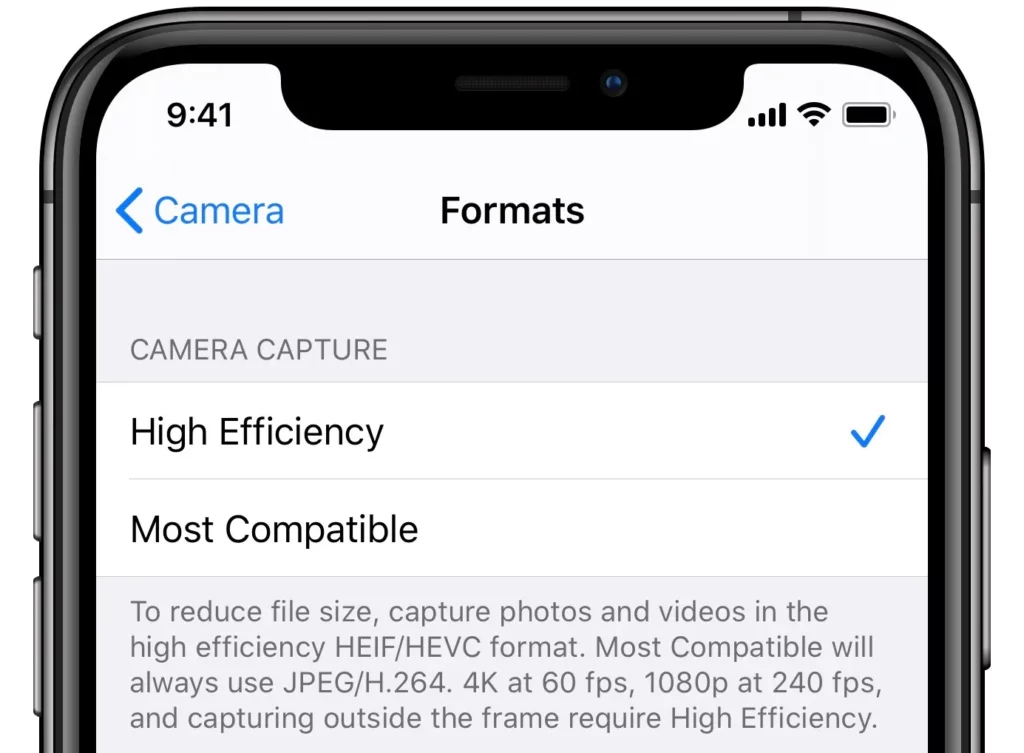
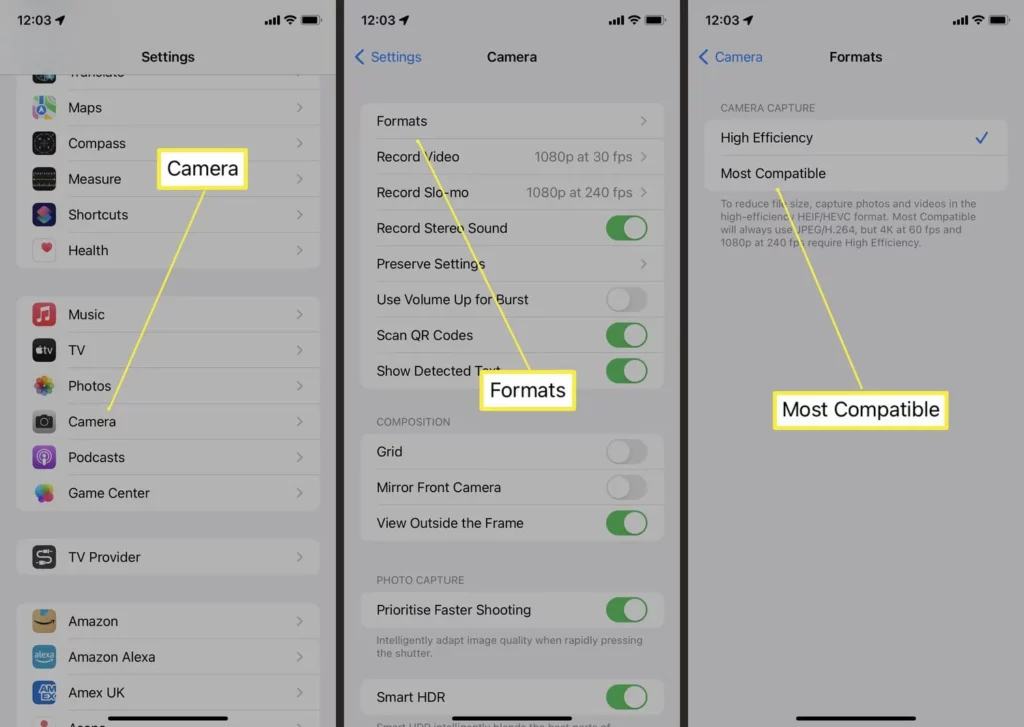
To change from HEIC to JPG on an iPhone, you must first set the camera capture format in the iPhone and iPad Settings app. The camera capture settings have two options: high efficiency and most compatible. High Efficiency takes HEIC pictures, while Most Compatible takes JPG pictures.
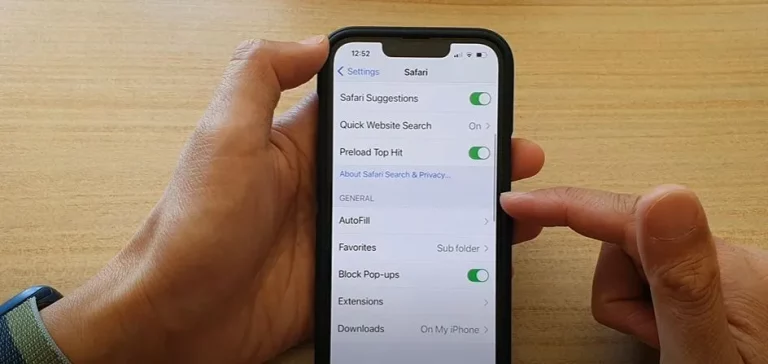
- Also, open the Settings app on your iPhone in the first step. Go down the page and select Camera. Then, from the list of camera settings, choose Formats.
- After selecting “format,” a window will open, allowing you to choose Most Compatible under Camera Capture.
After this transformation, your new unshot photos will be in JPG format, and your iPhone will begin to capture images and open HEIC files.
Method 2
How to Use the Automatic Transfer Setting On The iPhone To Convert HEIC to JPG on iPhone
The functionality of method one is constrained because your older photos will still be in the HEIC format. Instead, see Method 2 for more information. In light of this scenario, you may use the Automatic Transfer Setting to transfer and copy photos or old photos to Windows, Mac, Android devices, etc.
En
Sure, the automatic transfer setting is on, and you transfer your files to a Windows computer or a Mac. To do this, tap the photo’s icon in your iPhone settings, then select “automatic transfer” under Mac or PC. Windows works just fine. JPG format will be used for the transfer.
Your file is stored securely in HEIC image to JPG format during this transfer. The following approach is strongly advised because, despite how simple and convenient this may seem, Windows may not be willing to open or view files initially in the HEIC format.
Using and opening the files app included in iOS 11 on the iPhone is another way to convert HEIC to JPG automatically. Both iPhones and iPads can run the app natively.
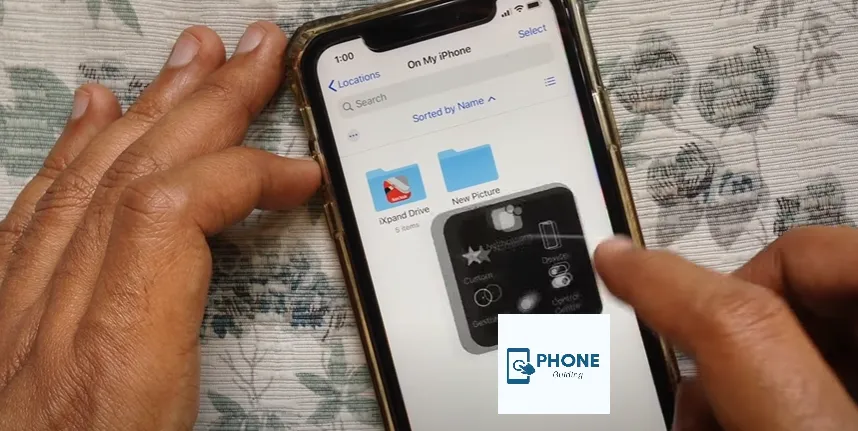
- Launch the “Files” app as soon as possible. Choose “On My iPhone” as the location. If you favor it, you can also choose a cloud storage option. However, since you are saving in the cloud, you should choose the latter because the photos might not always be accessible offline.
- Tap anywhere in the open space and hold it. When the pop-up appears, choose “New Folder” and give the folder any name you like.
- Select “Done” from the menu. Go to the album containing HEIC photos by opening the Photos app.
- Please select the item by clicking on it in the top toolbar.
- Select each of the images you want to convert.
- Choose “Copy Photos” from the “Share sheet” that appears.
- As a result, the images are now on your clipboard. Reopen the “Files” party app and navigate to the folder you previously named and created.
- Tap anywhere within a blank space, then choose “Paste” from the pop-up menu to convert HEIC to JPG.
- Your HEIC photos will finally show up in JPG format.
How to Change HEIC on A Mac to JPG or PNG
Don’t worry if you’ve transmitted some images from your iPhone and now have a few HEIC images on your Mac. Check out some apps that can open HEIC files before you remove those pictures and transfer them from your phone. There are a few simple methods for converting those files to the JPEG file format if the app you intend to use doesn’t support HEIC.
How to Use Preview to Convert HEIC to JPG or PNG
Using the Preview Photos app is one of the simplest ways to convert a HEIC to a JPG on a Mac.
- In Preview, open the HEIC file.
- To export, select File.
- Pick JPG or PNG from the Format drop-down menu.
- Press Save.
How to Use Photos to Convert HEIC to JPG or PNG
Using the Photos app on your Mac is another simple way to convert your photo from HEIC to JPEG or PNG. Follow these instructions to convert your image:
- Find the File you want to convert by opening the Photos app.
- Choose the file.
- Select Export > Photo from the File menu.
- From the drop-down menu for Photo Kind, select JPG format or PNG.
- Press Export.
- Click Export after deciding where you want to save your photo.
Understanding the advantages and disadvantages of HEIC and JPG
- HEIC advantages: smaller file size with minimal quality loss, support for transparency and animation, and efficient storage on the iPhone.
- HEIC disadvantages: limited compatibility with older devices and software; potential quality loss upon conversion to JPG; editing flexibility may be restricted.
- JPG advantages: universally compatible across devices and software; well-established editing tools; suitable for web sharing and email.
- JPG disadvantages include a larger file size compared to HEIC, potential loss of image quality with compression, and limited support for advanced features like transparency.
Alternatives to manual conversion:
- iPhone camera settings: Choose “JPEG” instead of “HEIC” as the photo capture format in Settings > Camera > Formats.
- Third-party photo apps: Many camera apps offer built-in options to capture photos directly in JPG format.
- Cloud storage services: Some cloud storage platforms can automatically convert HEIC photos to JPG upon upload.
Batch conversion options:
- Photos app: Select multiple photos in the Photos app, tap “Share” > “Export,” choose “JPEG” format, and select preferred image quality.
- Third-party conversion apps: Explore dedicated apps like iConvert HEIC, HEIC to JPG Converter, or Photo Converter for bulk conversion with additional features like file size optimization.
- Mac Finder (macOS): Select multiple HEIC photos, right-click > “Export Photos,” and choose JPEG format and desired quality.
Quality considerations during conversion:
- Conversion settings: Choosing higher-quality settings in conversion apps minimizes but doesn’t eliminate JPG compression artifacts.
- Original image quality: Higher-quality HEIC photos generally retain more detail after conversion compared to lower-quality ones.
- Multiple conversions: Avoid repeated conversions between HEIC and JPG to prevent cumulative quality loss.
Compatibility issues with converted JPGs:
- Older devices and software: Some older devices and software may not properly recognize or display converted JPGs, especially if using less common JPG variants.
- Specific software requirements: Certain software programs may require specific JPG versions or settings, potentially causing compatibility issues with converted files.
- Testing converted files: Always test converted JPGs on intended platforms and software to ensure proper display and functionality.
By understanding these additional points, users can make informed decisions about HEIC and JPG formats, utilize convenient conversion methods, and minimize potential quality or compatibility issues when dealing with their iPhone photos.
Conclusion
These are comparatively simple procedures that you can use to complete your image conversion in a flash from HEIC to JPG on an iPhone.
FAQs
Why are my pictures HEICs rather than JPGs?
The likely offender is that your photo was saved in Apple’s proprietary image format, a heic file rather than JPEG. With iOS 11, Apple committed HEIC back in 2017 as a way to conserve storage space as the iPhone camera system developed.
What software can open HEIC files?
HEIC files can be opened by any Apple-made or supported app without a problem. This applies to programs like Preview, Photos, iMovie, and others. Adobe Lightroom will let you import a proprietary version of the heic, though it will instantly convert the file to a JPG. Other programs, like Adobe Photoshop, will only open HEIC files on Mac computers.
Is it worth converting HEIC to JPG?
Regarding both compression and image quality, HEIC files win out over JPEG. The HEIC format can enhance the quality of photos with transparency and broader dynamic range capabilities.
Why did Apple switch to HEIC?
Apple has been using the HEIC image format since the 2017 release of iOS 11 because HEIC images are smaller than JPEGs, but websites and internet services have not widely adopted the HEIC format. Some newer Android smartphones also use the HEIC format.

