How Can You Modify or Change the Number of Rings Before The iPhone Go to Voicemail?
Now, you can change the number of times your iPhone rings before a call is directed to voicemail. It is a type of feature that your carrier primarily manages. If you want to alter it, you can call them and ask them to change it for you. But you can also change it yourself. Changing the number of rings or the number of times your phone rings is relatively easy. Here are all the details you need to know about changing the number of rings on the iPhone.
The Process to Change the Number of Rings
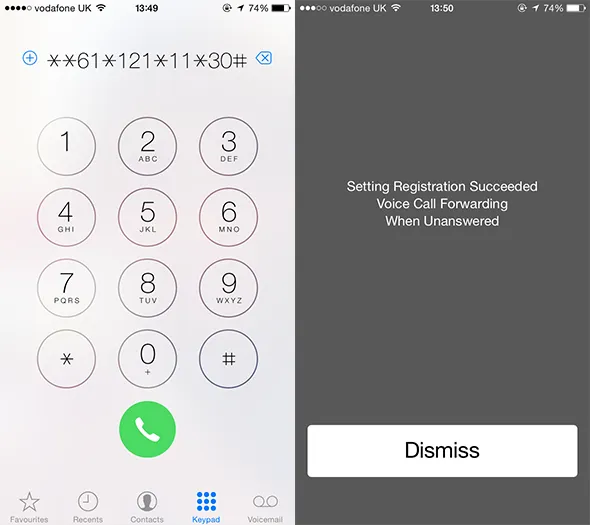
If you want to change the number of rings before your iPhone goes to voicemail, you can call your carrier or follow the following steps to change the number of rings on your iPhone:
Step No. 1: Get the Number of Your Voicemail
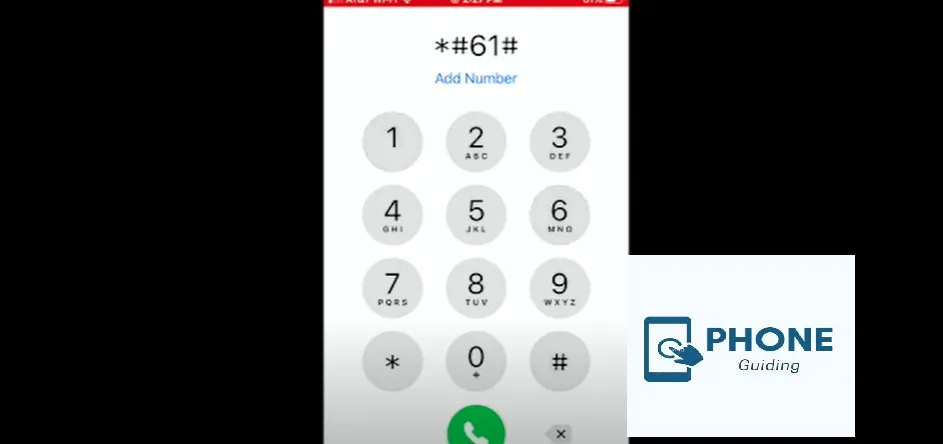
Firstly, you must go to the phone app and dial 61. You will get your voicemail number by doing so, and you have to write it down somewhere safe. Once you have the number, end the call.
Step No. 2: Input the Number of Your Voicemail
Then, you have to return to your phone app and dial 61. But don’t call this number this time; you must follow this code with your secret voicemail number. But once again, you don’t have to press the call icon.
Step No. 3: Put In the Number of Seconds of the Ring for Your iPhone
The next step is to type *11* and the number of seconds you want your device to ring after transferring the call to voicemail. For instance, if you want to be 10 seconds, you must have the following sequence: **61*123456789*11*10. Now, you have to make a call and press the call button.
If you follow the process thoroughly, you will get a confirmation notification.
The Process to Recover Voice Mail on iPhone
You may be a businessman, and sometimes it gets difficult to answer your phone and put it on voicemail, but you also want people to save time waiting for you to reply. So, you can set the number of rings before the voicemail answers. By doing so, if your iPhone is unanswered for some time, it will be directed to voicemail.
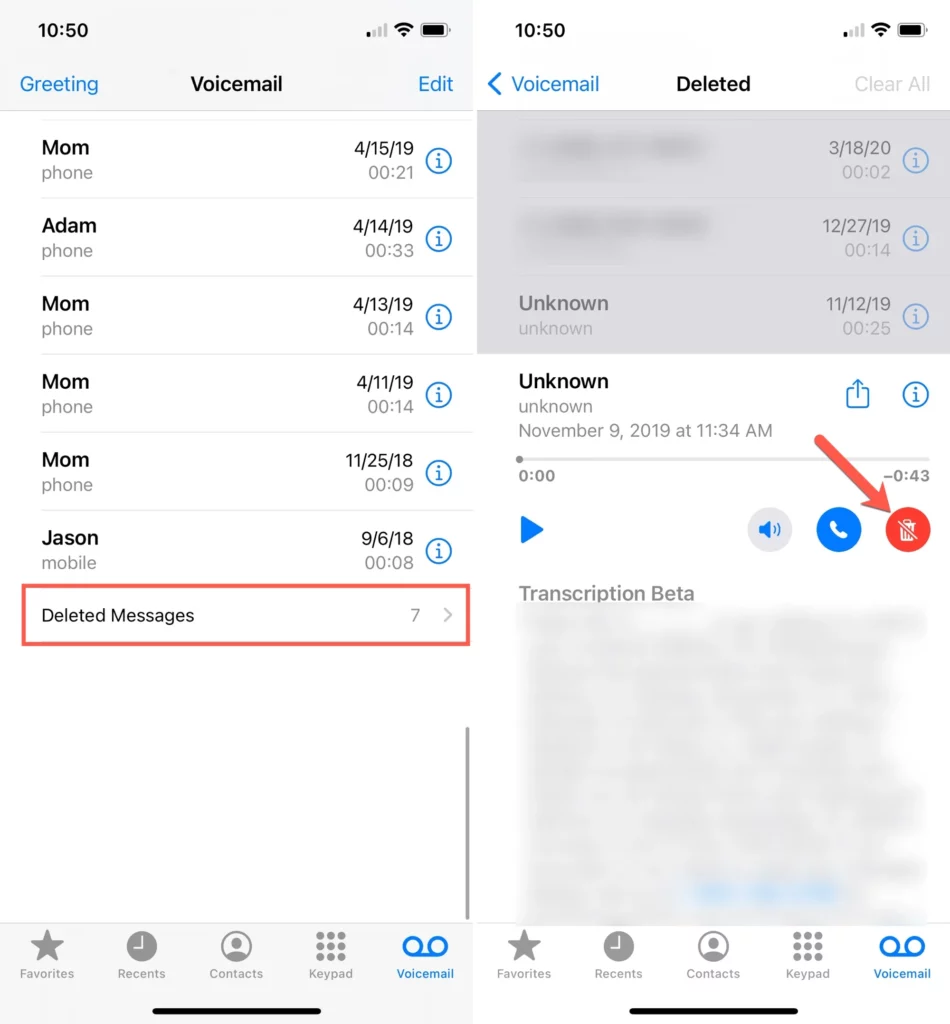
Then, people will save their time waiting for you to answer. And they will leave a message explaining why they called you. If you somehow deleted your voicemail from your phone, there is nothing to worry about, and you can download it again. Here are the steps you must follow: But you will need help even if you miss a detail.
Download the Application
First, open the phones. Then go to the app store and download and install the application of Dr. Fone: iOS Toolkit (iOS 14 supported) on your Mac. After that, open it. Then, connect your iPhone to your Mac.
Scan and Select Voicemails
Then, by default, you will be led to the “Recover from iOS Device” mode window. Then you have to check voicemail, or you can also check other apps if you want to recover them. Now, click on the option of “Start Scan. “It will also start scanning and show you the results later.
Scanning Process
After scanning, you can see the results and view them in detail by clicking them before you also decide to recover the iPhone.
Process for the Users of Verizon
Verizon carrier users might find a different menu like the one mentioned above. Verizon also does not offer a push notification menu. But there’s nothing to worry about. You can still get your ringer delayed by calling Verizon’s customer service number on your phone.
For example, you have to dial *611′ and ask the representative available to help you change the number of rings on your iPhone before it is directed to voicemail.
One thing you need to stay clear of is that your tendency to set the number of iPhone rings may vary depending on your location in the country. Sometimes, your phone will ring for as long as 40 seconds.
At the same time, in other areas, you may only be able to set the number of iPhone rings to a smaller maximum, or in some areas, you may not be able to extend it. This can help you set the number of rings before the iPhone goes to voicemail if you are a Verizon user.
Useful Tips and Tricks
Sometimes, your calls can get diverted to a recording that says, ‘This number is not listed. ‘It happens under two conditions:
- Your phone can be redirected to your voicemail.
- Which is not active.
- If you want to activate your voicemail, call 1509 from your phone.
- If all your incoming calls go directly to voicemail without ringing your phone, you have most likely also enabled the ‘Unconditional’ diversion service. You will have to disable this option.
- Sometimes, your calls are not directed toward your voicemail; instead, you hear a recording that says it can SMS its contact to you. This means that your ‘Missed Calls Service’ is enabled. You can disable this option by simply making a call at 159.
iPhone Number of Rings before Voicemail Verizon
Are you curious about the number of rings before your Verizon iPhone switches to voicemail? While iPhones don’t typically offer a built-in setting to adjust this, the carrier determines this duration. On Verizon, the default time before a call goes to voicemail is roughly 20 seconds, equivalent to 4–5 rings.
Remember, carrier settings may vary, and it’s advisable to contact Verizon’s customer support to check if they allow customization of this feature. Stay connected with your iPhone’s latest updates and tips to maximize your communication experience.
25 Ways to Change the Number of Rings Before Voicemail on An iPhone
Methods to change the number of rings before voicemail on an iPhone: Your cellular carrier typically provides options for adjusting this setting, which generally involves accessing your voicemail settings through the Phone app.
- Voicemail Settings in the Phone App:
- Open the Phone app, access Voicemail, and explore settings related to ring duration.
- Carrier Call Settings:
- Dial your carrier’s voicemail number and navigate the call options settings.
- Call Forwarding:
- Look into call forwarding settings within your iPhone settings.
- Carrier Code:
- Dial a specific code your carrier provides to change the ring duration.
- Contact Carrier:
- Contact your carrier’s customer service for guidance on changing the ring duration.
- Carrier App:
- Check if your carrier has an app that lets you customize voicemail settings.
- Online Account:
- Log in to your carrier’s online account to modify your voicemail preferences.
- Reset Voicemail:
- Temporarily change your voicemail greeting, which might trigger voicemail setting adjustments.
- Visual Voicemail:
- Use visual voicemail settings to access advanced options.
- Siri Commands:
- Ask Siri to change your voicemail settings or guide you through the process.
- iOS Updates:
- Update your iOS to access any new voicemail-related features.
- Third-Party Apps:
- Explore third-party apps that offer advanced voicemail customization.
- SIM Card Settings:
- Some carriers store voicemail settings on the SIM card; check for related options.
- Network Settings Reset:
- Possibly launch updates for your carrier by resetting your network settings.
- Roaming Settings:
- If roaming, your voicemail settings might be affected; adjust as needed.
- Alternate Carrier Numbers:
- Try different carrier voicemail numbers for alternative settings.
- Device Guides:
- Consult the official Apple or carrier guides for your specific iPhone model.
- Online Forums:
- Search online forums for user insights into specific carrier codes or settings.
- Carrier Website:
- Browse your carrier’s website for voicemail FAQs or guides.
- Carrier Email Support:
- Reach out to your carrier’s support via email for guidance.
- iOS Beta:
- Enroll in the iOS beta program for early access to potential voicemail changes.
- Developer Settings:
- If knowledgeable, explore iOS developer settings for advanced options.
- Voicemail Password Change:
- Changing your voicemail password might trigger setting updates.
- Voicemail Notifications:
- Modify notification settings for potential adjustments.
- Carrier Voicemail App:
- If available, use your carrier’s specific voicemail app for customization.
Remember, your steps will depend on your iPhone model, carrier, and software version. If you’re unsure, it’s always a good idea to contact your carrier’s customer support or consult official resources for accurate guidance.
Concluding It Up!
Learning to set the number of rings before voicemail answers with your iPhone is straightforward. All the steps and processes, along with some tips, are mentioned above, and you can easily change the number of rings before voicemail answers using this easy guide. If you are a Verizon user, you can do the same thing after downloading a few apps that allow you to do so for incoming calls.
To change the number of rings before voicemail on your iPhone, go to “Settings,” select “Phone,” and tap “Call Forwarding.” Adjust the “Forward to Voicemail” delay to your preferred number of rings. Customize this setting for iPhone 11, 12, 13, or any model for a personalized voicemail experience.
Can I change the number of rings before voicemail answers on airplane mode?
Yes, you can change the number of rings before voicemail answers in air-pinned mode.
Is the option of changing the number of rings available in voicemail settings?
Yes, changing the number of rings is available in voicemail settings.
Can I adjust the ring time before voicemail on my iPhone?
Yes, you can adjust the ring time before voicemail on your iPhone. This can be done through your iPhone’s settings, under the “Phone” or “Settings” app. You can change the number of rings before the call is sent to voicemail.
Is it possible to modify the time before my iPhone goes to voicemail?
You can modify the time before your iPhone goes to voicemail by adjusting the number of rings before the call is sent to voicemail. This can be done in your iPhone’s settings under the “Phone” or “Settings” app.
